Deploying a PlantUML Spring Boot application in a docker container to sloppy.io
I'm a big fan of including PlantUML diagrams for documentation using Asciidoc and Spring REST docs. Using PlantUML also saves time when visualising software designs as the cycle time of editing and seeing the new diagram can be much shorter that using drag and drop tools like Visio.
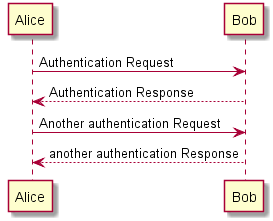
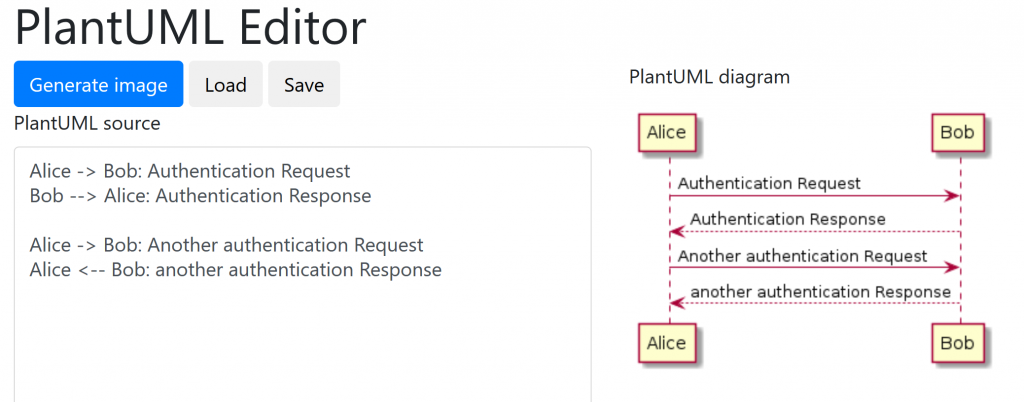
PlantUML works by taking in textual notation for a sequence diagram like below:
@startuml
Alice -> Bob: Authentication RequestBob --> Alice: Authentication Response
Alice -> Bob: Another authentication RequestAlice <-- Bob: another authentication Response
@enduml
and is able to generate a UML diagram.

The PlantUML site does have a link to an online demo tool where you can try on the various supported UML diagram types.
- Sequence diagram
- Usecase diagram
- Class diagram
- Activity diagram
- Component diagram
- State diagram
- Object diagram
- Deployment diagram
- Timing diagram
The online demo tool has limited capabilities and I wanted to build my own version that would both cater for online editing and also storage of those diagrams so that I could use it as a notebook of software diagrams.
I started to build an Online Editor for myself last year. The application was initially deployed to Heroku with basic editing functionality. However, PlantUML java library has a dependency on the Graphviz library for all other diagram types but sequence. So to add the ability to add further diagram types to the Online Editor it makes sense to package both the application and its dependency in a docker container. The docker container then also needs to be hosted somewhere. For the hosting I'm going to trial sloppy.io where they have a nice simple interface for deploying and running Docker containers.
tl;dr
- Build a Docker container for Spring Boot application with PlantUML and Graphviz dependencies
- Push to Docker Hub
- Build and run on sloppy.io
Online Editor GitHub Project
To get a copy of the project you can clone the github repository.
git clone https://github.com/teggr/online-editor
The project is currently a simple Spring Boot web application, built using maven and has a dependency on PlantUML available through maven central.
pom.xml
<!-- plant uml -->
<dependency>
    <groupId>net.sourceforge.plantuml</groupId>
    <artifactId>plantuml</artifactId>
    <version>8059</version>
</dependency>
Run the Spring Boot application and open http://localhost:8383 to see the working application in your browser. To build, run a `mvn install` from the command line.
Adding Docker
Assuming that you have Docker installed and available from the command line then, you have all you need to build and run the container locally.
To get the application up and running I've started with a small Dockerfile that builds on the OpenJDK container and installs both GraphViz and locally built application. Upon being run, the container will lauch the Spring Boot application.
Dockerfile
FROM openjdk:8-jdk
RUN apt-get update && apt-get install -y \  graphviz
ENV GRAPHVIZ_DOT /usr/bin/dot
COPY target/online-editor-0.0.1-SNAPSHOT.jar /usr/share/online-editor-0.0.1-SNAPSHOT.jar
EXPOSE 8383
CMD ["java", "-XX:+UnlockExperimentalVMOptions", "-XX:+UseCGroupMemoryLimitForHeap", "-jar", "/usr/share/online-editor-0.0.1-SNAPSHOT.jar"]
To build the image and run the container, we can use the following commands. The Online Editor should then again be available on http://localhost:8383
docker build -t online-editordocker run --publish 8383:8383 online-editor
Storing Image to Docker Hub
Next step for the Docker Image is to host it somewhere that can be accessed by sloppy.io. They have built in support for Docker Hub and Quay.io.
For this project I'm pushing to my own Docker Hub account and repository:
docker build -t teggr/online-editor:0.0.1docker push teggr/online-editor:0.0.1
The docker image is available at https://hub.docker.com/r/teggr/online-editor/
Deploying
Now that we have a publicly hosted docker image we can run the application on sloppy.io. When I started this post there was a 14 day free trial and paid plans from £5 a month.
sloppy.io has some useful guides to deploying your first docker container.
https://kb.sloppy.io/getting-started
Download the CLI and add the exe to PATH
c:> sloppyusage: sloppy [--version] <command> [<args>] [--help]
Available commands are:
    change           Change the configuration of an application on the fly
    delete           Delete a project, a service or an application
    docker-login     Uploads docker credentials to sloppy.io
    docker-logout    Removes docker credentials from sloppy.io
    logs             Fetch the logs of a project, service or app
    restart          Restart an app
    rollback         Rollback an application
    scale            Scale the number of instances in an application
    show             Show settings of a project, a service or an application
    start            Start a new project on the sloppy service
    stats            Display metrics of a running app
    version          Prints the sloppy version
Next step is to add your API token as an environment variable. In windows I did this through the system environment variables gui.
Once the CLI has been successfully configured you can start the application remotely on the command line. You can also do this through the admin console.
sloppy start --var=domain:robintegg-online-editor.sloppy.zone sloppy-online-editor.json
This makes my application available at http://robintegg-online-editor.sloppy.zone

Summary
Getting a Spring Boot application into a Docker container is relatively simple now. I've taken a fairly simple approach for the moment in constructing my docker image. There are many best practices to follow when creating Dockerfiles. The offical OpenJDK image also documents some best practices.
Getting your application into a Docker image is only half the job done. The other half is wading through all the Docker hosting options. From do it yourself to fully managed, minute-by-minute to monthly billing there are so many options. I've plumped for sloppy.io as it seemed to be a nicely thought out offering to help me get my container up and running with minimal fuss. To that end I was not disappointed, I signed up for the free account, followed the get started guide to understand my next steps, then deployed!
Sloppy.io gives a nice PAAS level of abstraction for deploying containers and doesn't seem overly priced. I can deploy up to 50 containers, though I need more time to understand how I can run multiple containers within my allocated resoures. I'm sure I will extend my trial period into a paid one. Well done sloppy :)
As for the Online Editor, next steps are to add some storage features and start using TravisCI to build and deploy the application.
